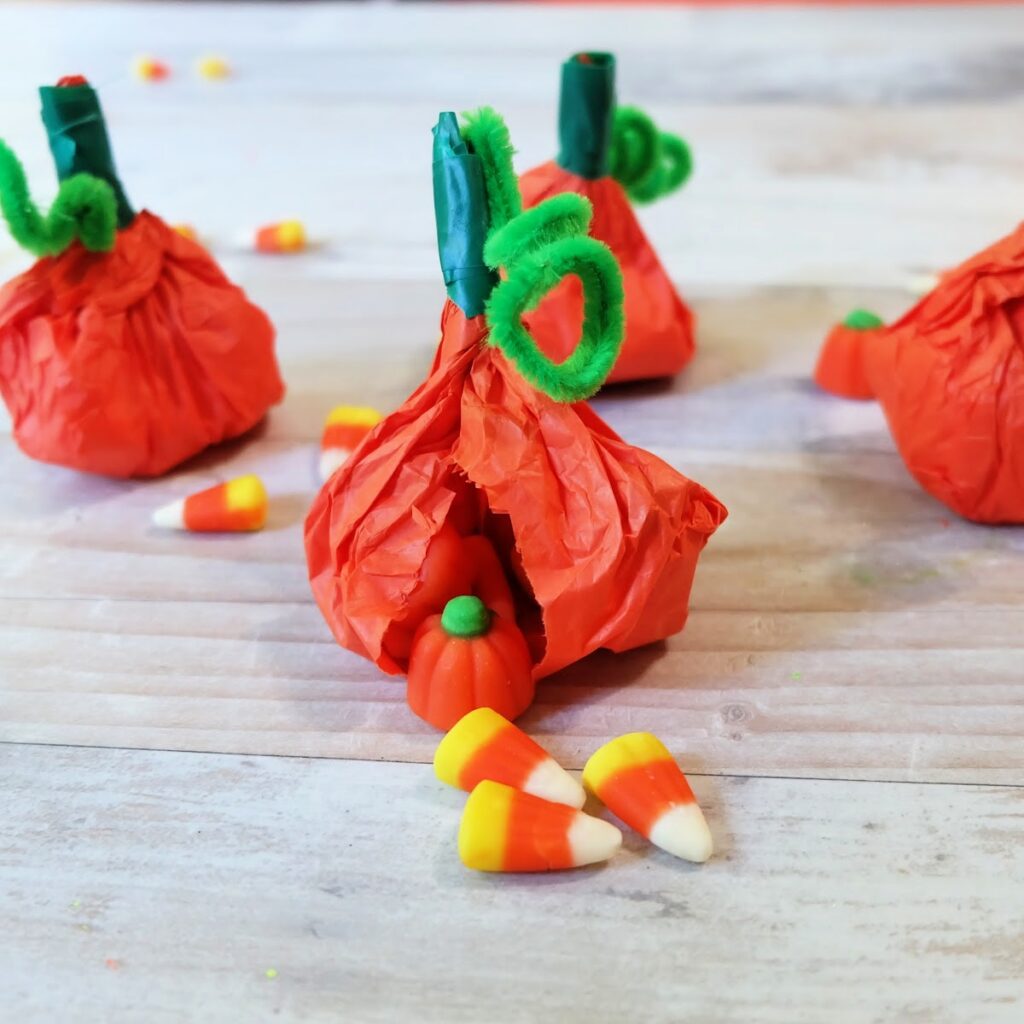
Tissue Paper Pumpkin {Goodie Bag Idea}
Halloween parties, get-togethers and celebrations are in full swing and we have the perfect Halloween goodie bag idea for yours! These Tissue Paper Pumpkin goodie bags are easy to make and are the perfect favour. Bundle them up and set them out! Check out how to make these fun treat bags.
This blog post may contain affiliate links. What does that mean? We may get a small commission if you make a purchase using our links, which helps us to keep posting new holiday content every week.

What can I put in a Halloween goodie bag?
Mini is the way to go for these Tissue Paper Pumpkins. Think small toys, mini pumpkins, and of course – candy. If you’re having a get-together you could set up a craft station where guests create their own favours to take home!
How do I display Tissue Paper Pumpkin Goodie Bags?
Place your goodie bags in a festive or woven basket on a table with a sign saying that guests can help themselves. These Tissue Paper Pumpkins are a great way to display candy if you won’t be home for Halloween but still want to participate.
How many Halloween goodie bags do I need for Trick-or-Treaters?
If each trick-or-treater usually gets 2-3 pieces of candy, you will need at least one Tissue Paper Pumpkin for each child.

What do I need to make a Tissue Paper Pumpkin?
- Orange tissue paper
- Scissors
- Plate and pencil for tracing a circle
- Green electrical tape
- Green pipe cleaner
- Small candies or non-edible Halloween treats
How to make an easy Halloween goodie bag?
- Using a plate, trace a circle onto 2-3 pieces of tissue paper
- Cut the circle out.
- Place the small candies or treats onto the middle of the circle of tissue paper.
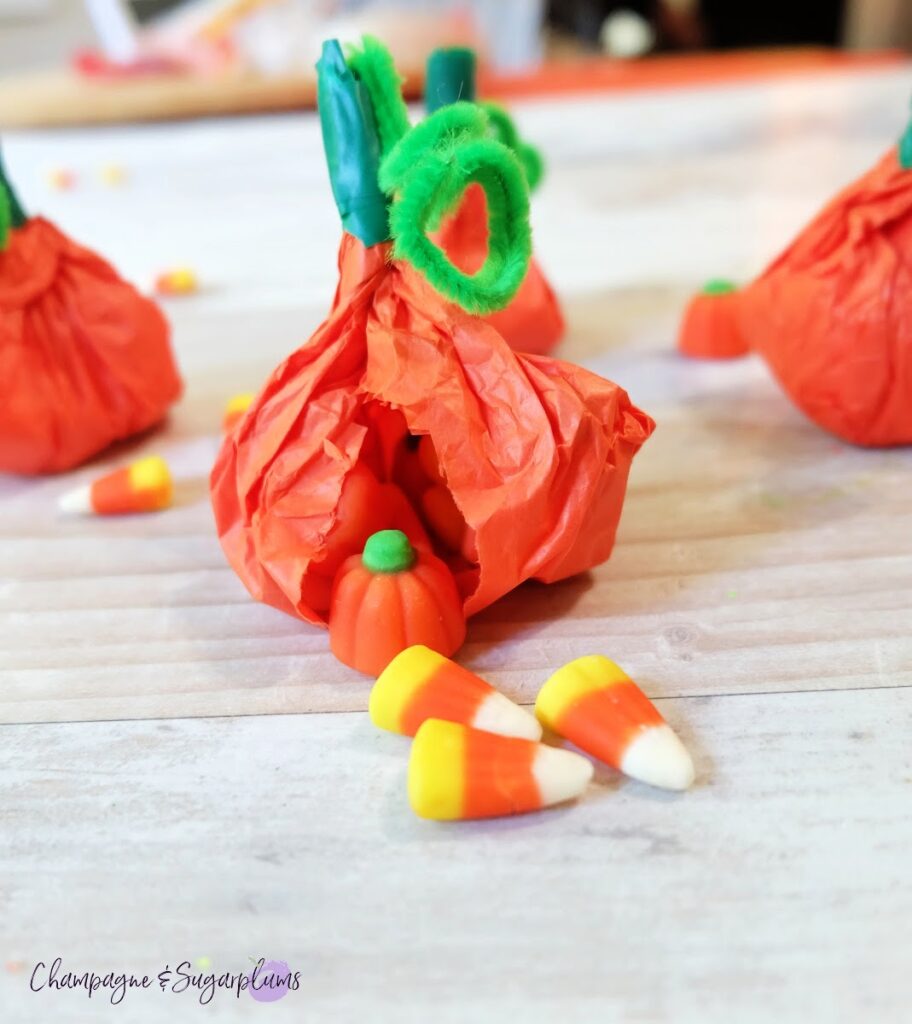
- Wrap the treats up by pulling the edges of the tissue paper in towards the middle. Pinch the edges together.
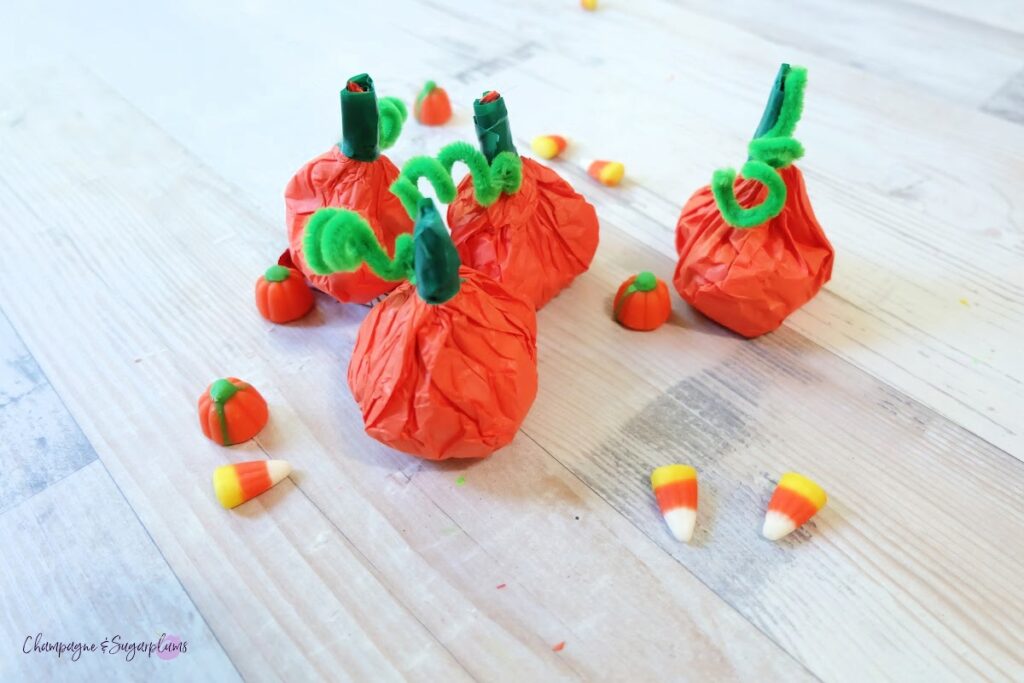
- Using the green electrical tape, tape the top of the tissue paper, creating a pumpkin.
- Twist green pipe cleaner around the pencil used to trace the circle. Attach the curly “vine” to the pumpkins using a small amount of the green electrical tape.

Tissue Paper Pumpkin Photo Tutorial!

First, using a plate, trace a circle onto 2-3 pieces of tissue paper.

Next, cut around the traced circle.
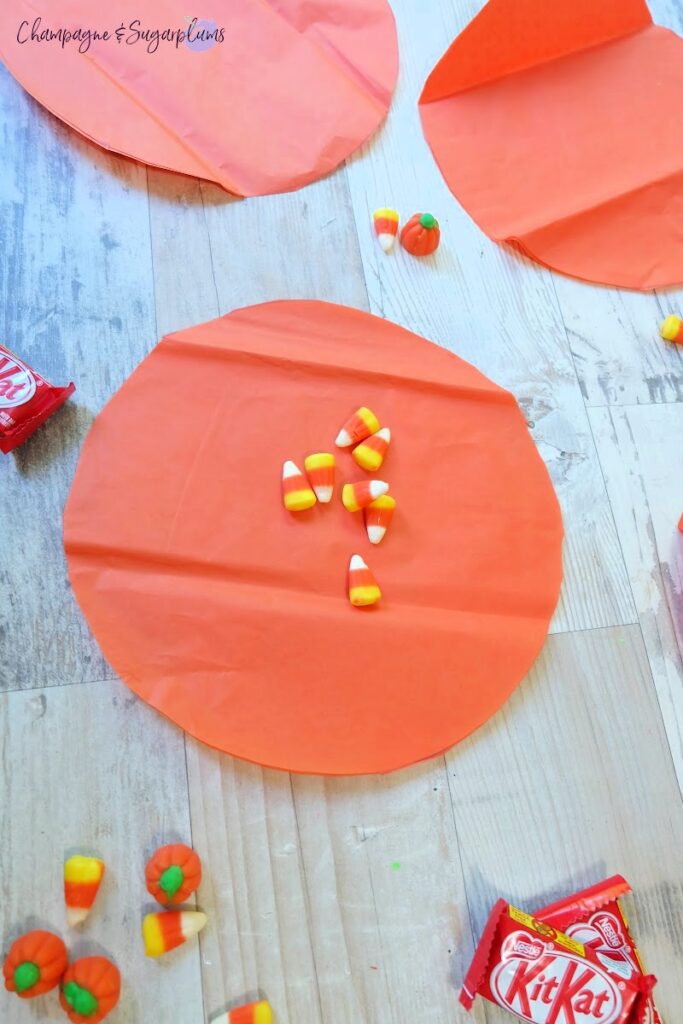
Then place small candies or treats into the middle of the tissue paper circle.

Wrap the treats up by pulling the edges of the tissue paper in towards the middle. Pinch the edges together.

Using the green electrical tape, tape the top of the tissue paper, creating a pumpkin.
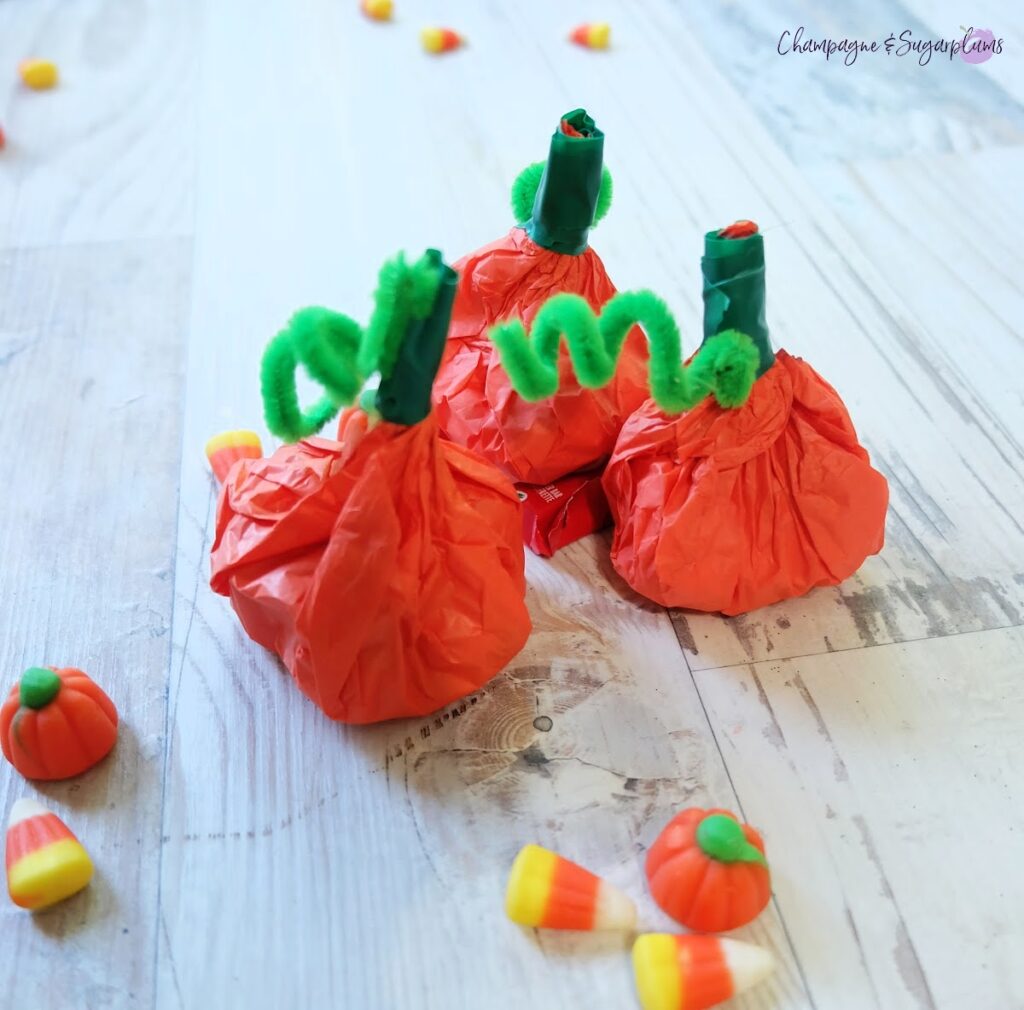
Twist green pipe cleaner around the pencil used to trace the circle. Attach the curly “vine” to the pumpkins using a small amount of the green electrical tape.


We hope you loved these Tissue Paper Pumpkin Goodie Bag Ideas! If you’re looking for more Halloween fun, check out our other DIY, crafts and recipes. You won’t want to miss out on our amazing Creepy Quesadillas!
More Halloween DIY and Craft Ideas:
- Easy Creepy Spider Planter
- Countdown to Halloween Blocks
- Simple DIY Cork Pumpkin
- Easy Macrame Pumpkin Cover
Halloween Recipes:


DIY Magic Monster Spray

You May Also Like
How to Decorate Pumpkin Patch Cupcakes
Sweet and Spicy Pumpkin Cupcakes