DIY Christmas Stocking Holder
Don’t have a mantel to hang your stockings on? Or do you have a mantel but don’t have enough stocking holders? We can help! This week we are excited to show you our fun DIY Christmas Stocking Holder!
This blog post may contain affiliate links. What does that mean? We may get a small commission if you make a purchase using our links, which helps us to keep posting new holiday content every week.


This cute wooden Christmas stocking holder is perfect for homes with or without a traditional fireplace mantel. This tutorial shows how to make a stocking holder that stands on the floor, but you can also make it hang on the wall by attaching a wall hanger to the back! Either way, it will look and work great!
Two ways to make this stocking holder!
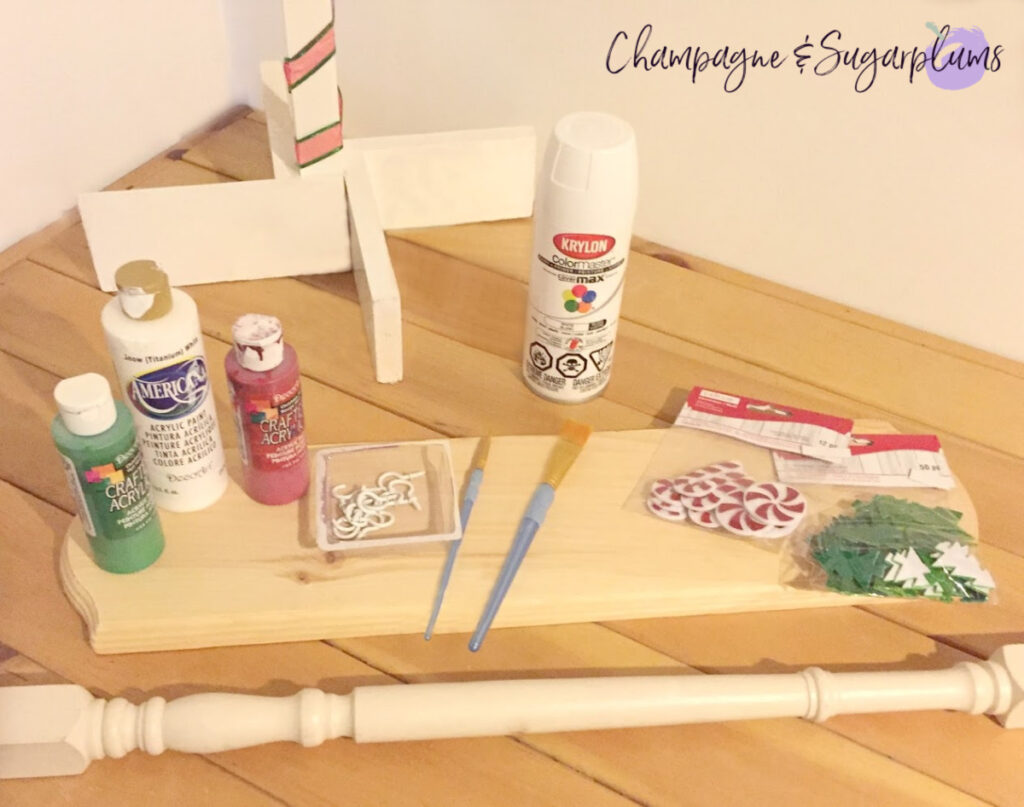
What do you need to make a Christmas Stocking Holder?
- Banister Post (check out your local restore!)
- (4) 4” x 5” wooden boards (to hold the banister up)
- Large Wooden Board
- Red, White, and Green Acrylic Paint
- Red Spray Paint
- Hanging Hooks
- Nails
- Hammer
- Ruler
- Pencil
- Ribbon (Optional)
- Glitter (Optional)
- Embellishments (Optional)
- Glue (For Embellishments)
- Hot Glue Gun (For Ribbon)

How do you make a stocking holder?
Firstly, spray paint the banister post and the four base pieces according to the directions on the can. Allow the spray paint to dry after every coat, it may take several coats to complete, once finished set them aside.
Project Tip: You can find a banister railing at your local restore, you may even get lucky and find one that’s already painted white.

Next, paint the face of the main board with red acrylic paint; you’ll likely need more than one coat. Once dry, paint the back of the board and the outer edge.
Almost done making your own DIY Wood Christmas Stocking Holder!
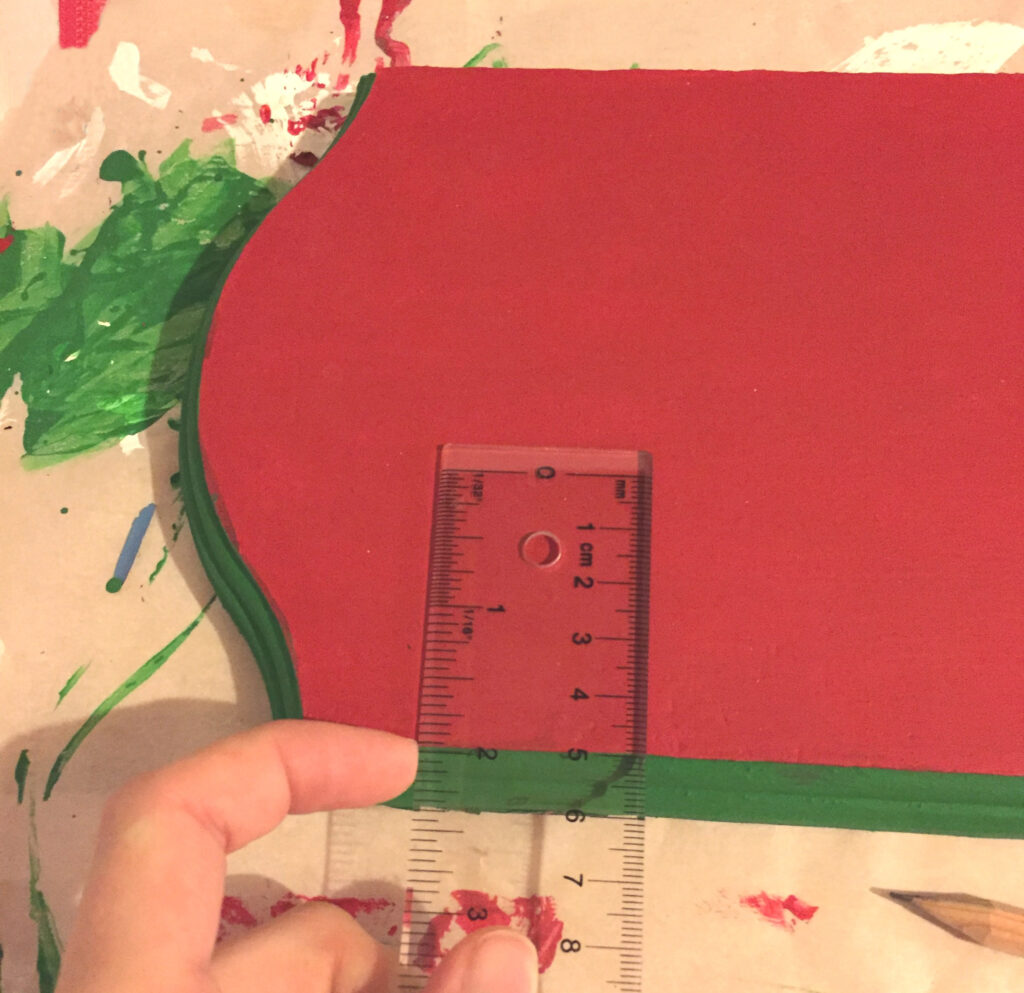
Once the face board is completely dry, measure and lightly draw a line to use as a guideline for your lettering. Be sure not to press too hard with or it will dent the board.

Freehand the letters or use a stencil. For those who have one, this can be a great opportunity to use your Cricut!
Glitter can be added to the letters after the paint dries by tracing the letters with glue.
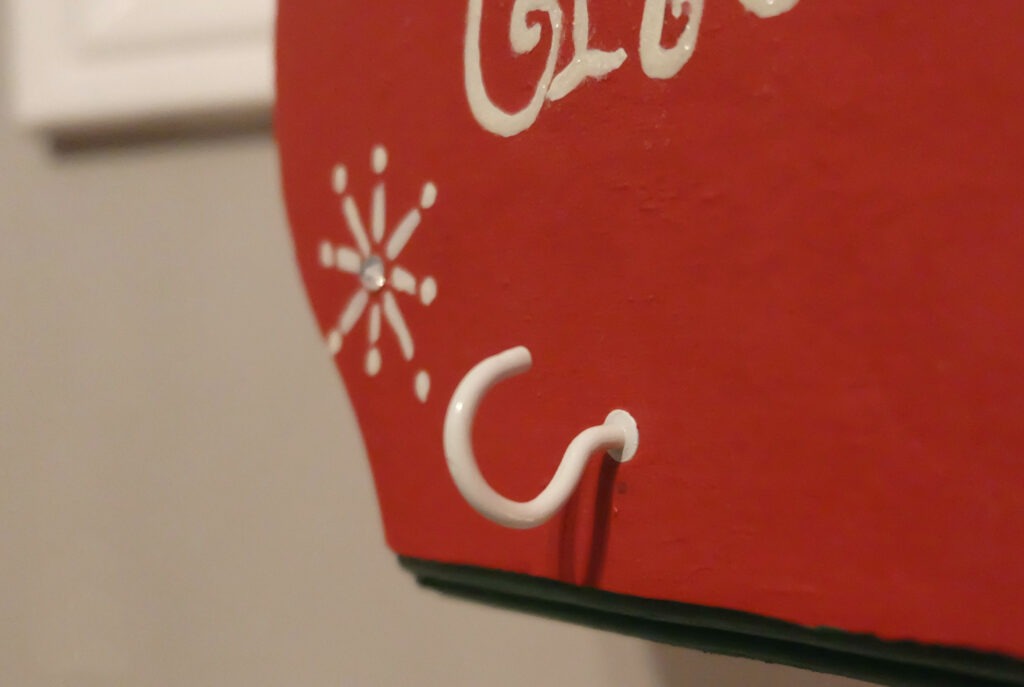
To finish the main board off, screw in the hooks. Space them out equally, using the ruler and pencil to measure and mark where they will go across the bottom of the board.
Finally, construct the holder by nailing the four pieces of wood to the bottom of the post, acting as feet. One piece of wood for each side of the pole. At the top, nail the main board using two or three nails.
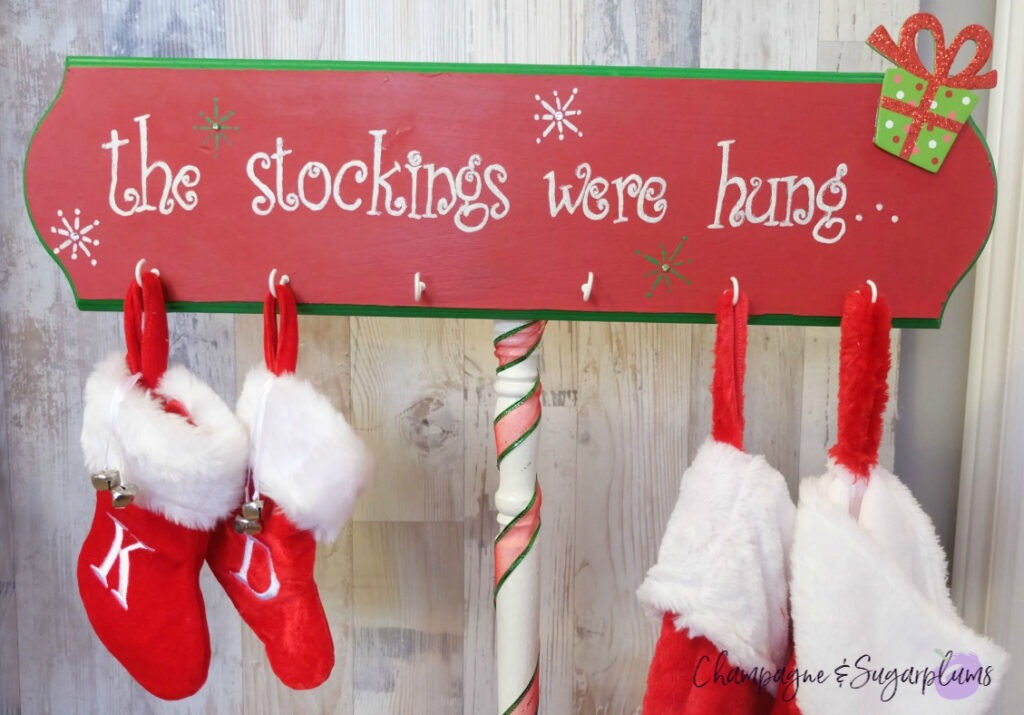
Get creative and add ribbon to the post, sparkling stickers, jewels, snowflakes and more to the main board!


We hope you loved this DIY Christmas Stocking Holder as much as we did! If you’re looking for more Christmas fun, certainly check out our other ideas!
More Christmas Decor and DIY:
- Personalized Outdoor Christmas Sign Post
- 2-Step DIY Coastal Christmas Starfish
- Retro Christmas Photos Transfer Decorations
- Silhouette Decorations with FREE printable!
Christmas Crafts for Kids to Make:
- Christmas Handprint Art for Kids — perfect for Baby’s 1st Christmas!
- DIY Candy Cane Wreath
- Popsicle Stick Bucket List — Christmas activities!
- Over 25 Christmas Crafts for Kids
- How to Make Ice Globes — Christmas lights in the snow!
Christmas Recipes:
- Champagne Cocktail with Pink Whitney
- Natural Peanut Butter Snowballs
- Grinch Mini Cheesecake Bites
- Polar Bear Martini
Don’t forget to check out our popular Christmas Movie Checklist with FREE Printable!