How to Make a Macrame Pumpkin Cover
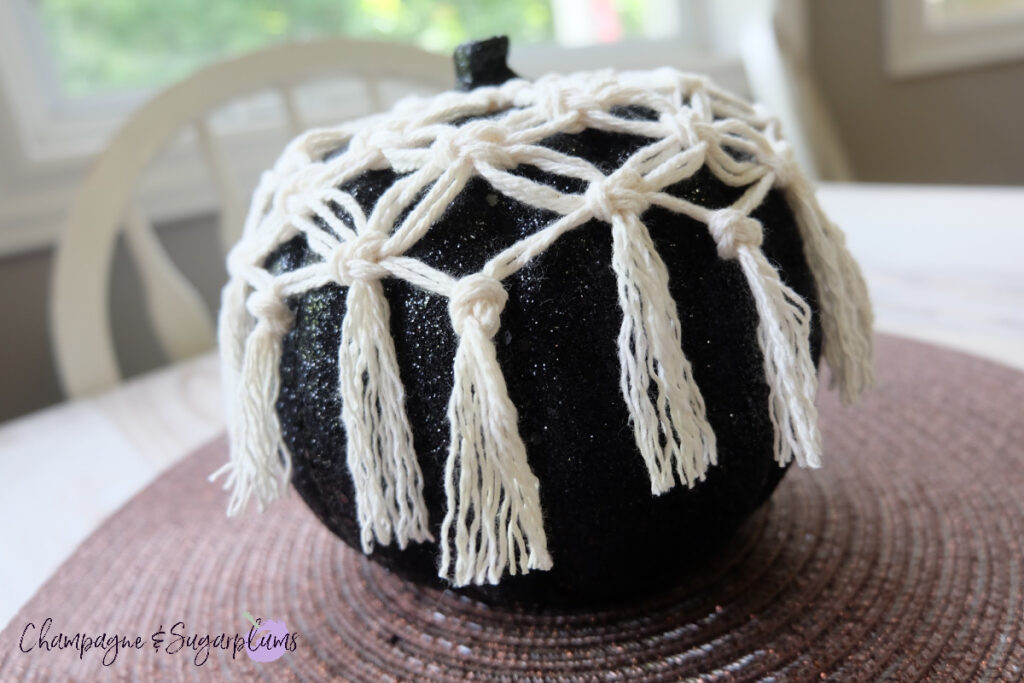
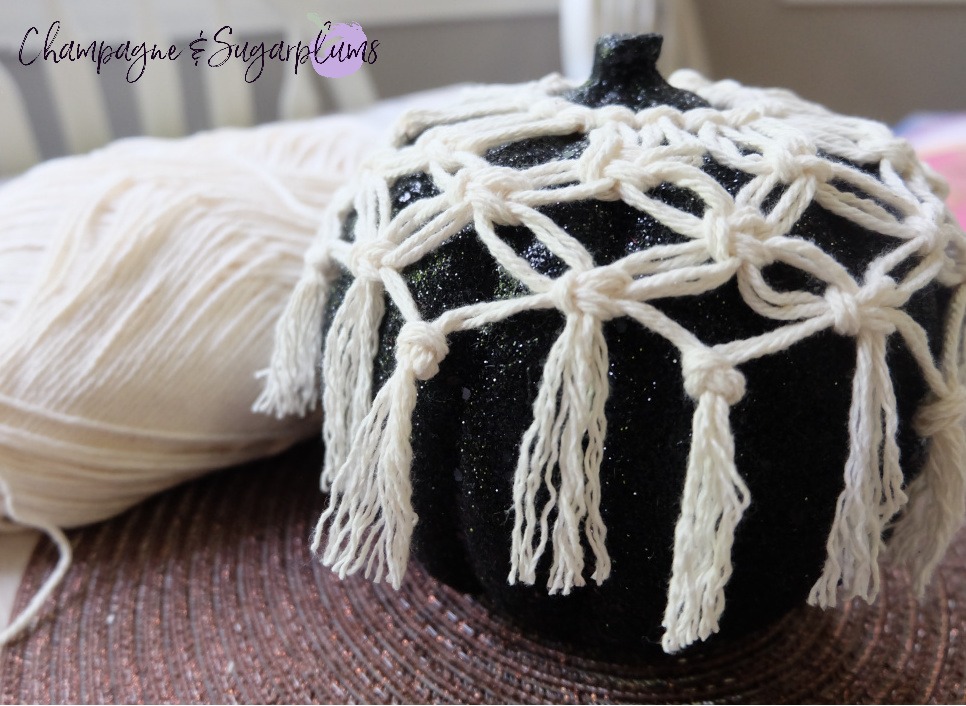
This is an easy macrame project, perfect for beginners or experts! A great project for Thanksgiving or Halloween. See how to make your own Macrame Pumpkin Cover for your table, foyer, mantel or porch. This pumpkin cover is perfect for false pumpkins or real ones.
This blog post may contain affiliate links. What does that mean? We may get a small commission if you make a purchase using our links, which helps us to keep posting new holiday content every week.

We recently shared our Macrame Plant Hanger Tutorial and we loved it so much we decided to create a pattern for Halloween or Thanksgiving! It can work for either occasion. This easy macrame pattern is guaranteed to get you hooked on this classic art form.
This project is very simple and totally fun. The best part is you can get all the materials at your local dollar store. You can use a foam pumpkin or real – then all you need is some strong cotton yarn or thin cord. A glue gun and scissors are also needed. This craft does take some time to finish but once you get a good flow going, your knots will be done in no time.
What do you need to make a Macrame Pumpkin Cover?
- Cotton yarn or cord
- Foam or real pumpkin
- Hot glue gun with glue sticks
- Scissors

How to Make a Macrame Pumpkin Cover – Macrame Pumpkin Wrap
Firstly, cut a long single piece of string – the length will depend on the size of your pumpkin. You basically need it to go around the top of your pumpkin stump. This will act as the centre “loop”.

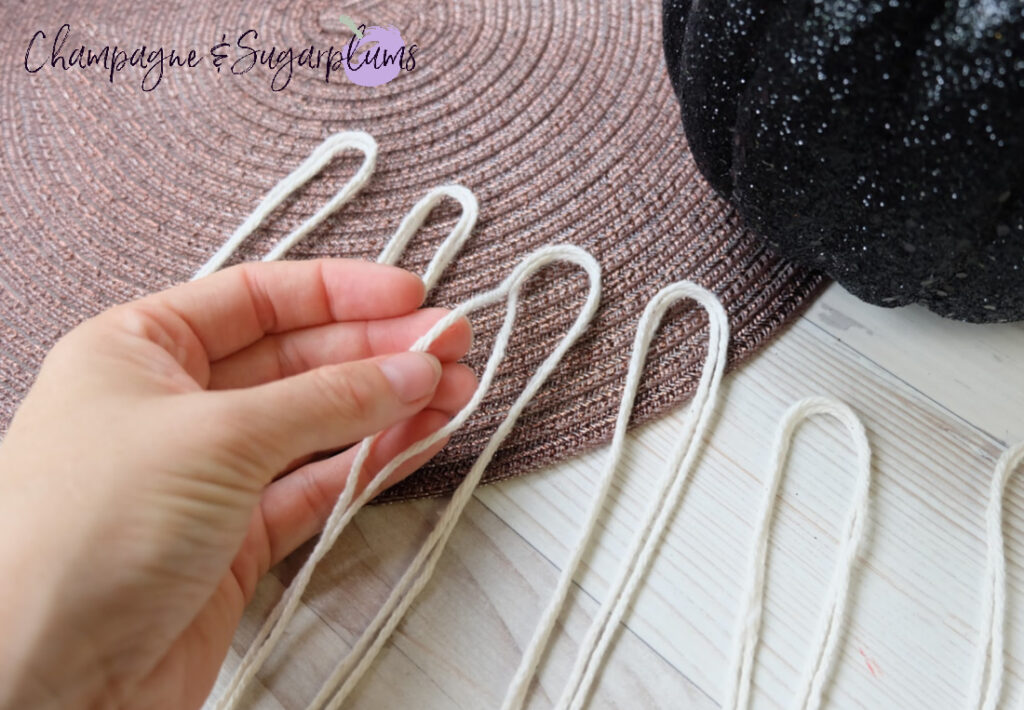
Secondly, cut several long lengths of string. Be sure to cut them long, making the knots will take up some of the length. We cut ours to about 36 inches long. Double each strand.


Attach the long lengths of string to the original length of string (the one that will become the centre loop). A simple loop around is all that is needed to being the macrame.

Once all of the strings are looped around, tie the original length together to form the loop.
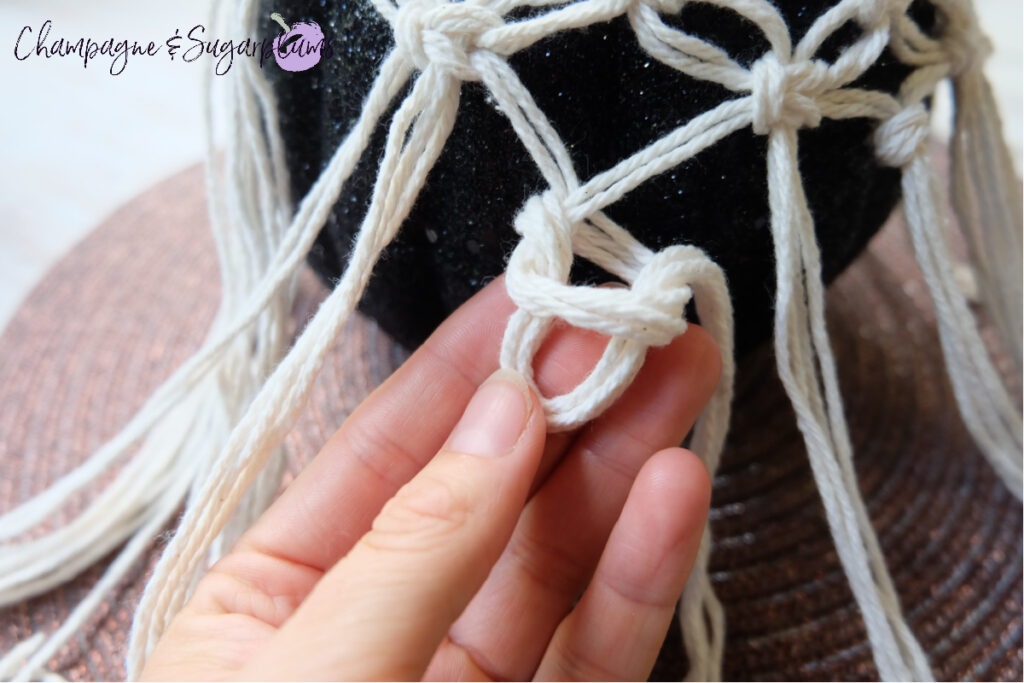
Lay your circle on the table and begin making your square knots. We will use this simple knot for the whole cover. You may find it easier to work on the table or maybe directly on the pumpkin – do whatever feels best for you.
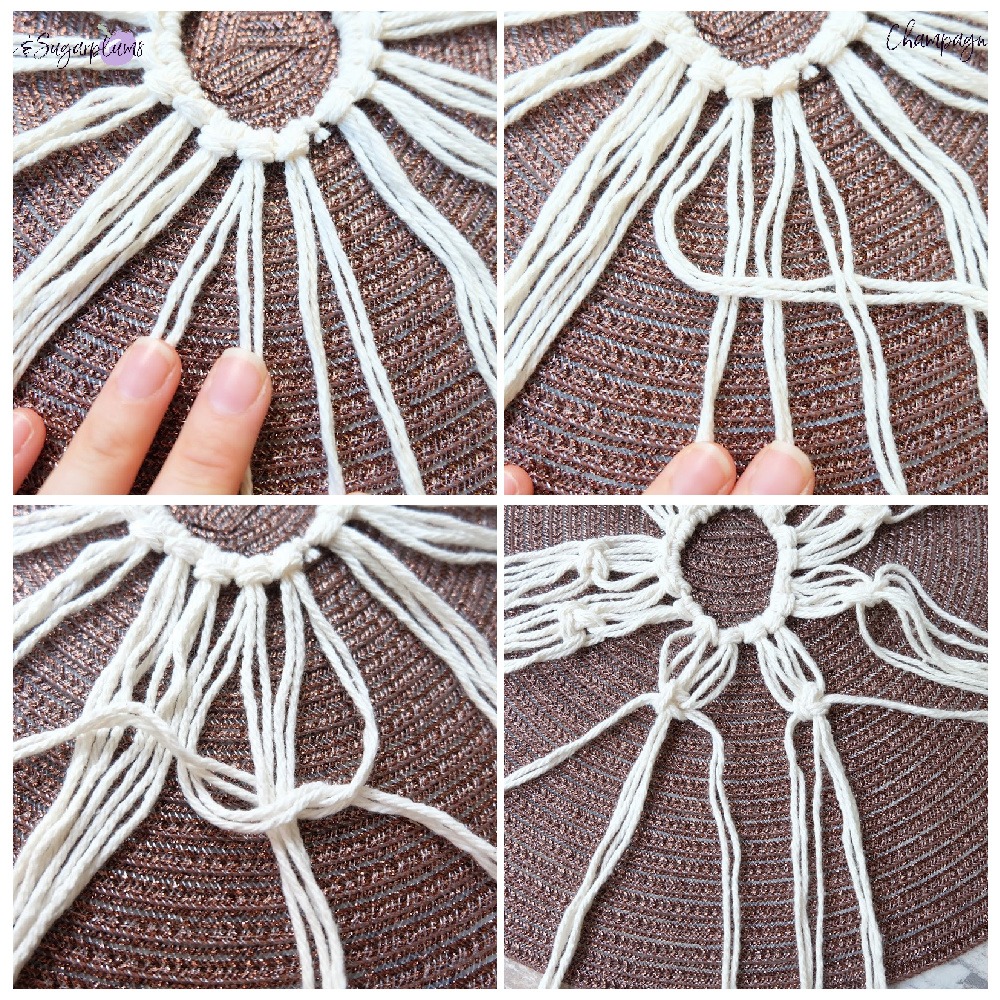
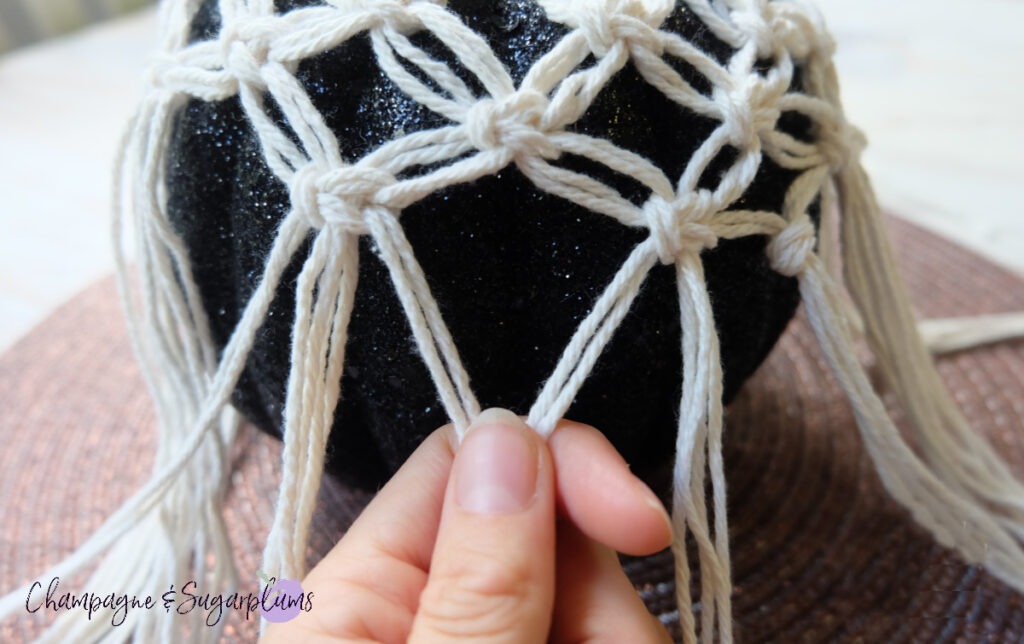
Begin by taking two of the looped strings and splitting them into four equal parts, two strings per group. Cross the far left strings over the middle two and under the far right. Then, bring the far right up under the middle two strings and through the hole created by the first step. Gently pull the strings together to form a knot. See the picture for a visual step by step.
Repeat this step across the entire loop, then again until there are about three layers of knots.

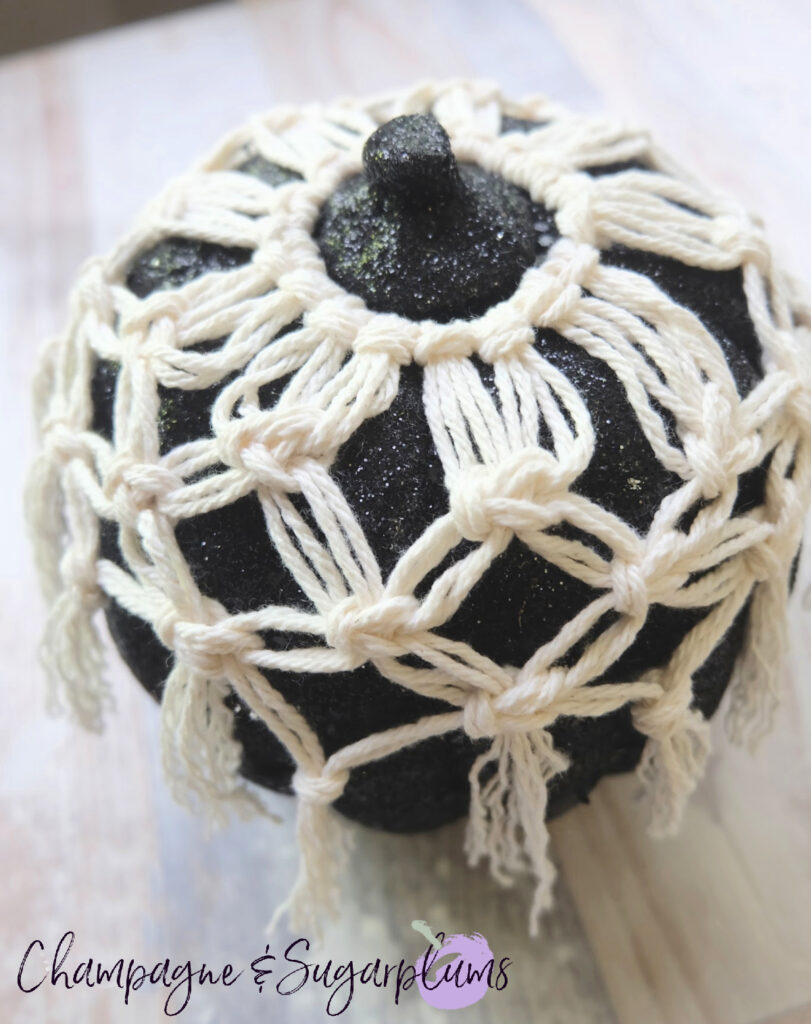
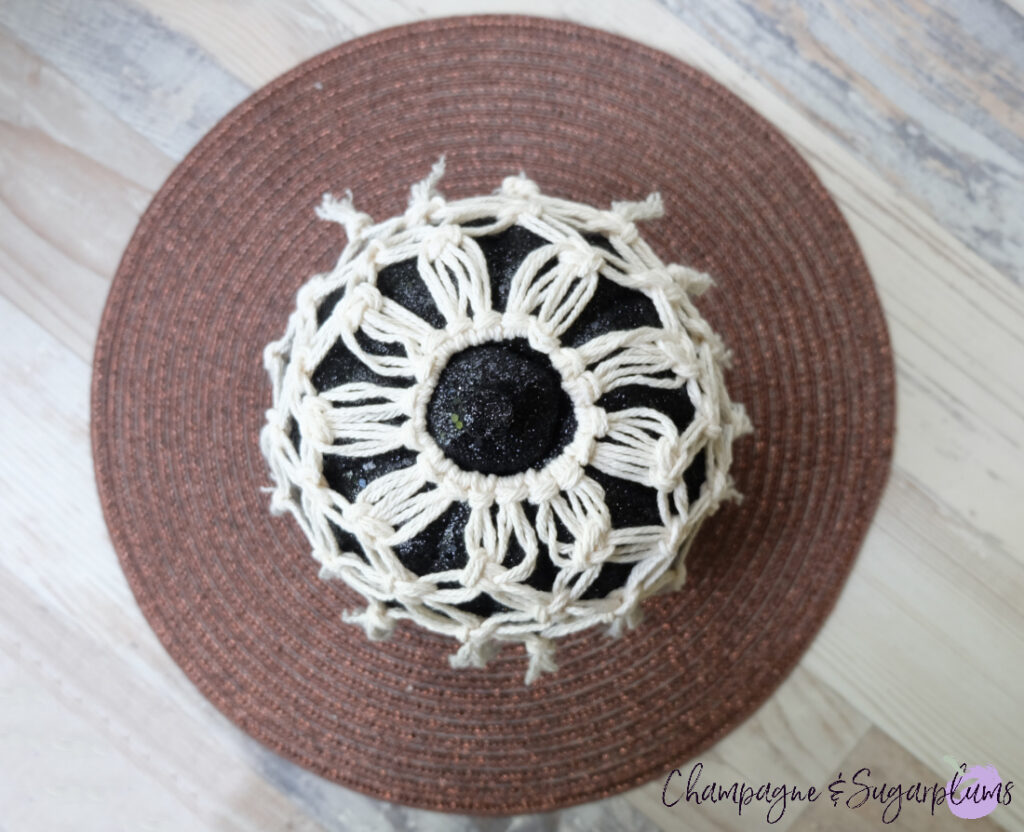
You’re Almost Finished Your New Macrame Pumpkin Cover!
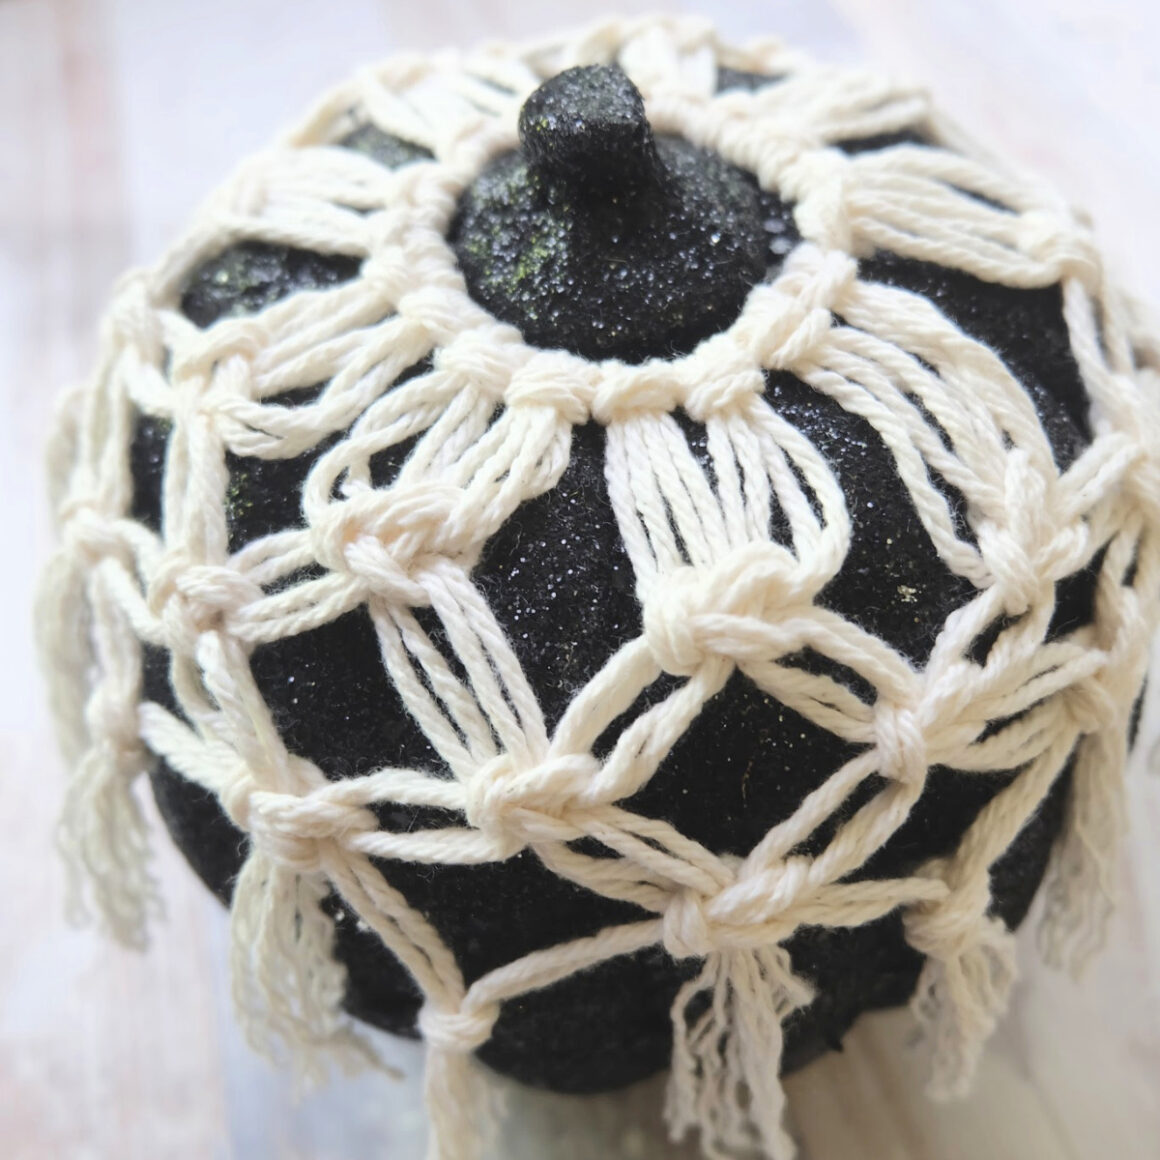
This craft looks best if the knots cover at least half of the pumpkin and the tassels reach the table top.
When there are enough macrame knots tie the ends off using a simple knot.
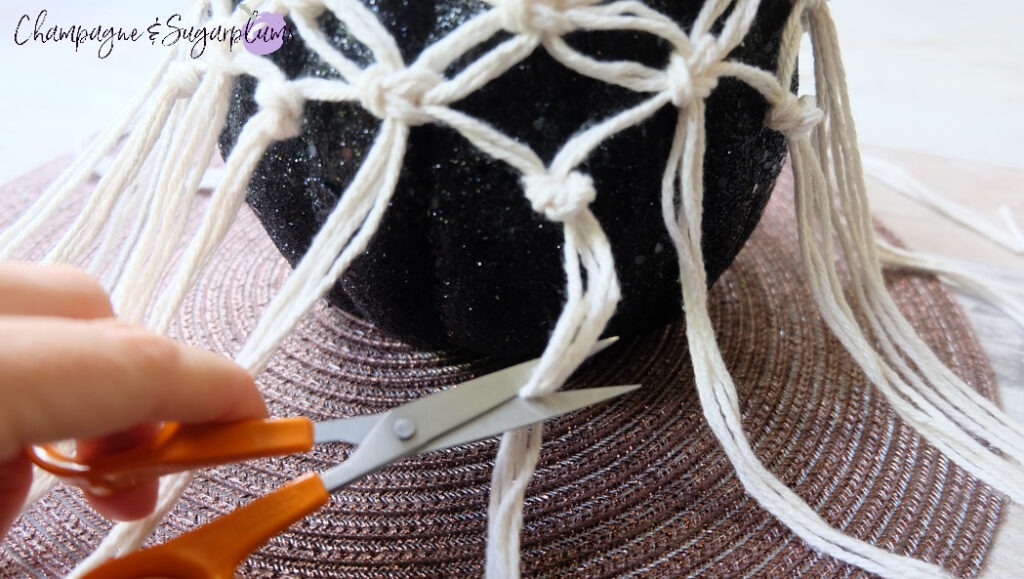
Cut the extra string off.


Finally, separate the tassels to make them ‘puff’.
Crafters Tip: You can use your hot glue gun to attach the macrame pattern to the top of your foam/real pumpkin. This will keep it secure to the pumpkin, so it won’t slide around.

We hope you liked this How to Make a Macrame Pumpkin Cover – Macrame Beginner Knot tutorial.