How to Make a Simple Felt Shamrock
If you’re not into staying up late and rocking a fedora and feather boa this St. Patrick’s Day, drink your green beer with a beautiful felt shamrock pin! This week we want to show you how to make a simple felt shamrock that you can wear this March 17th.
This blog post may contain affiliate links. What does that mean? We may get a small commission if you make a purchase using our links, which helps us to keep posting new holiday content every week.

This felt shamrock is so easy to make, you can even get your kids to make their own! You can easily add these to a headband, hair clip or backpack for an easy and fun St. Patrick’s Day accessory.
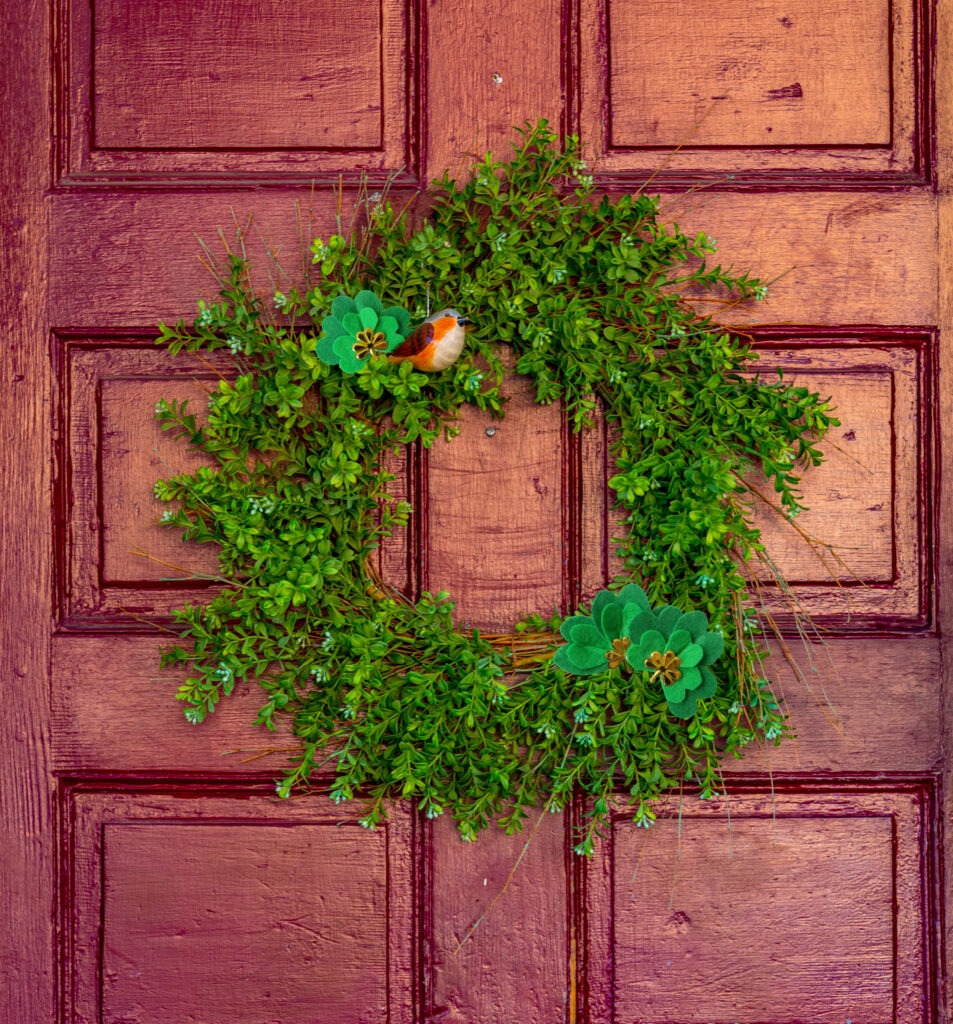
We also used this craft to make a beautiful wreath for the front door this March 17th.
Why do we call this a shamrock and not a clover? A clover must have three leaves to be considered a shamrock. If we added one more leaf, it would not be considered a shamrock! We can say all shamrocks are clovers…but not all clovers are shamrocks. But, that doesn’t mean you can’t add an extra leaf to this felt craft. If you want to sport a little luck this March 17th, simply add another leaf.
What do you need to make a How to Make a Simple Felt Shamrock?
- FREE printable
- Green felt in 2-4 shades
- Green embroidery thread
- A needle (kid friendly if you have little ones)
- Hot glue gun with glue
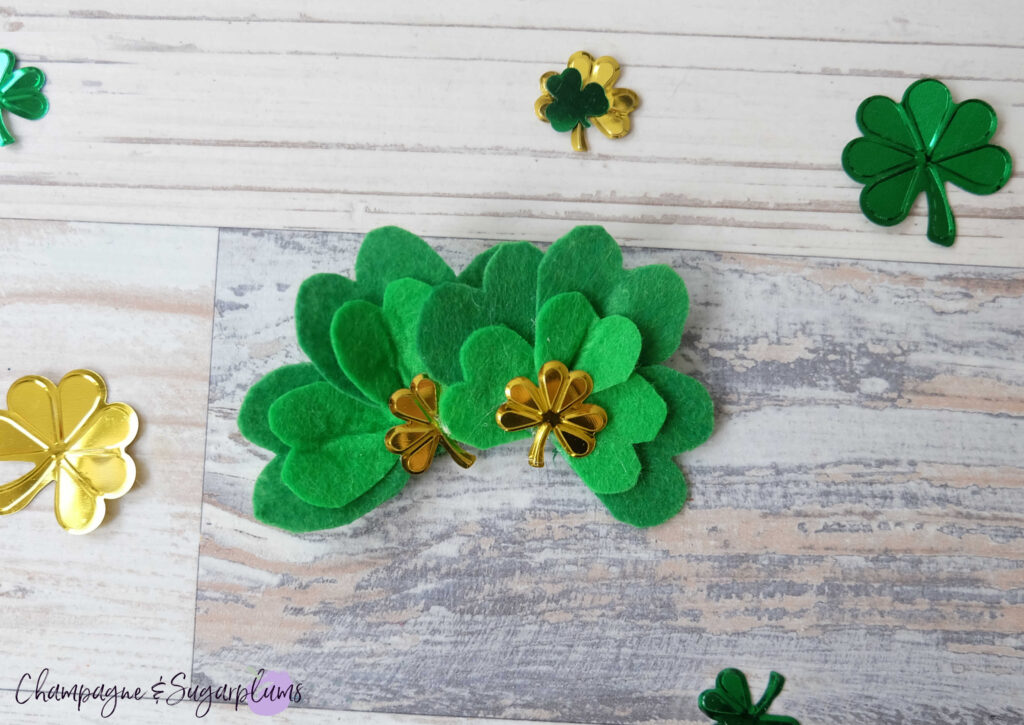
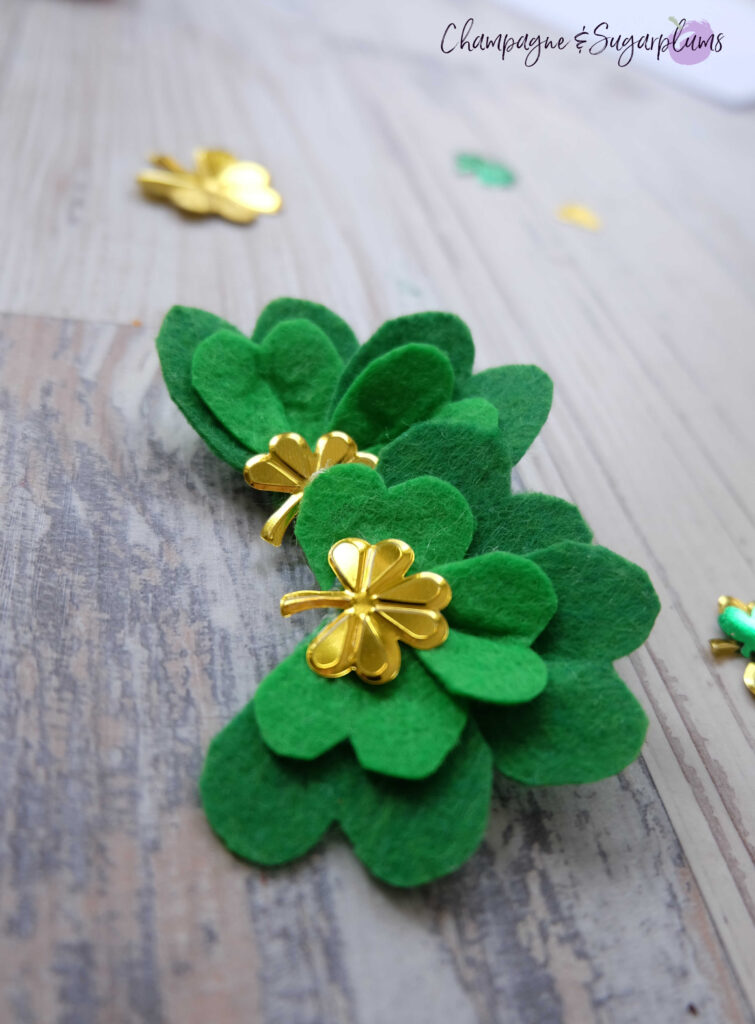
- Shamrock sequin
- Pin, hair clip or headband or wreath *optional*
How do I make an easy Felt Shamrock?
- Print and cut out our FREE leaf template
- Place the large leaf template on top of some felt
- Place the small leaf template on top of a different colour of felt (you can pin these down or trace around them to make it easier to cut out)
- Cut out three large and three small leaves (or four if you prefer to make a lucky clover!)
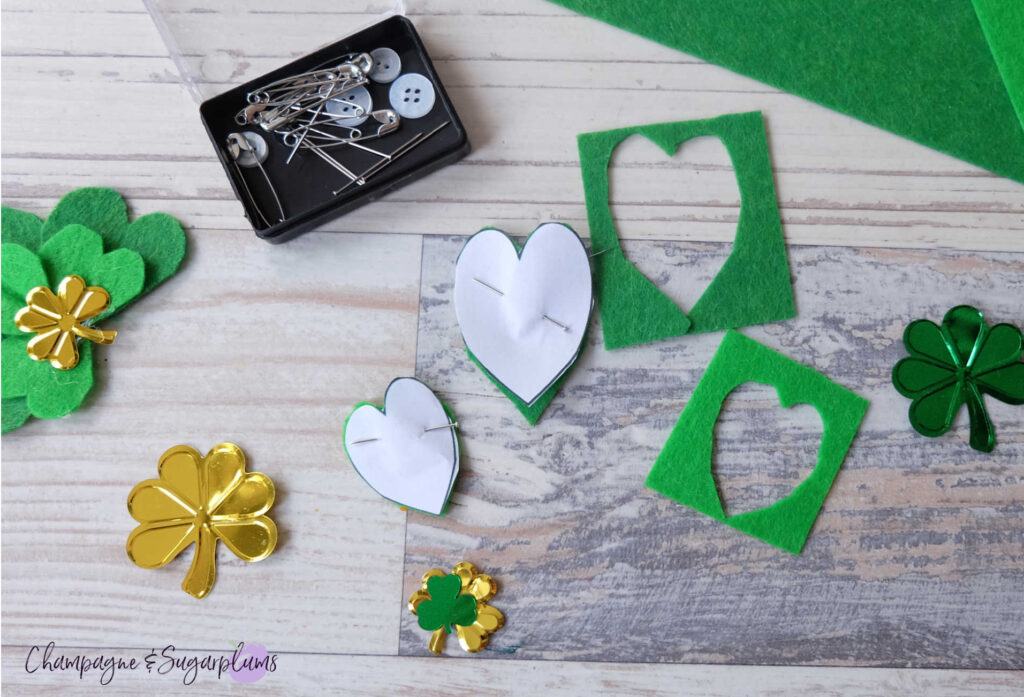
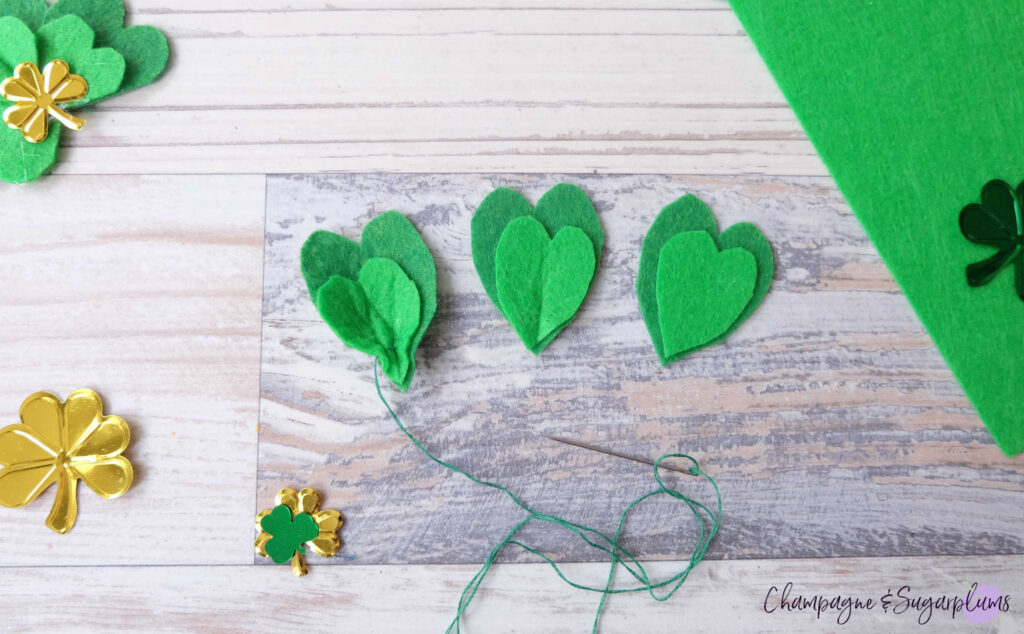
- Fold one of the leaf pieces in half lengthwise. Next, pass the threaded embroidery needle through the bottom of the leaf.
- Continue to add all the leaves, similarly, until they are all on the needle.
- Then, pull the needle through the leaves, and tie the tails tightly into a knot, gathering each leaf tightly as you work.
- Next, hot glue the shamrock to the pin, hair clip or headband
- OR add your shamrocks to a beautiful front door wreath!

How to Make a Simple Felt Shamrock for St. Patrick’s Day – Tutorial

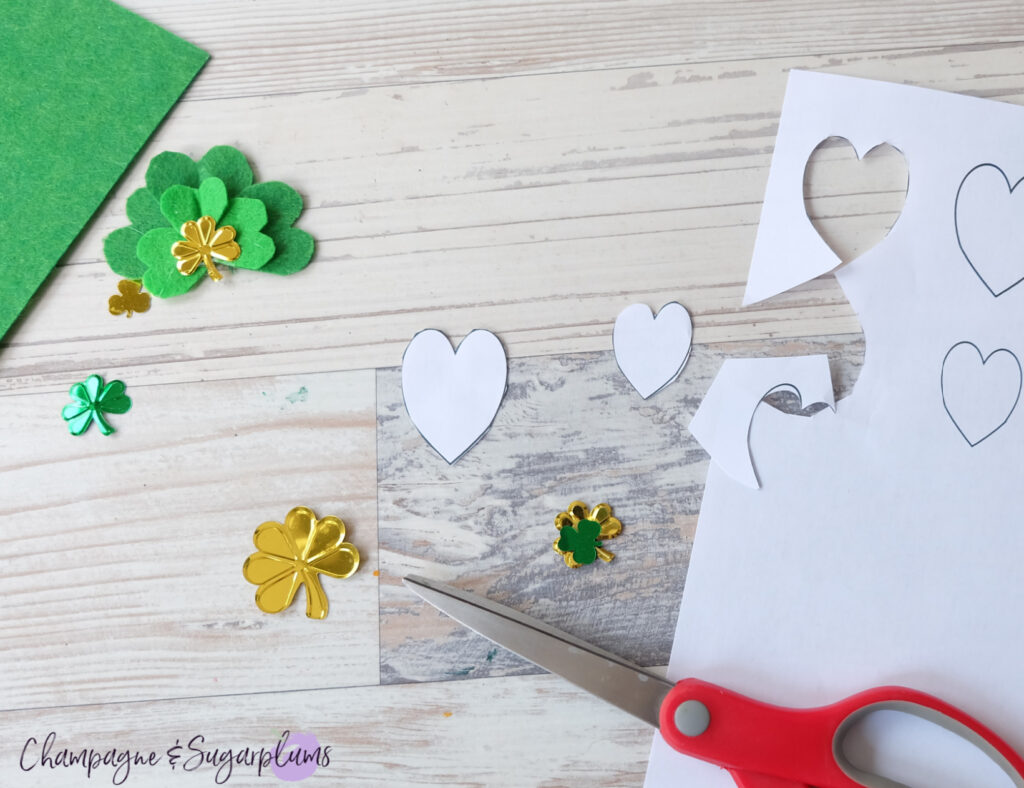
Print and cut out our FREE leaf template


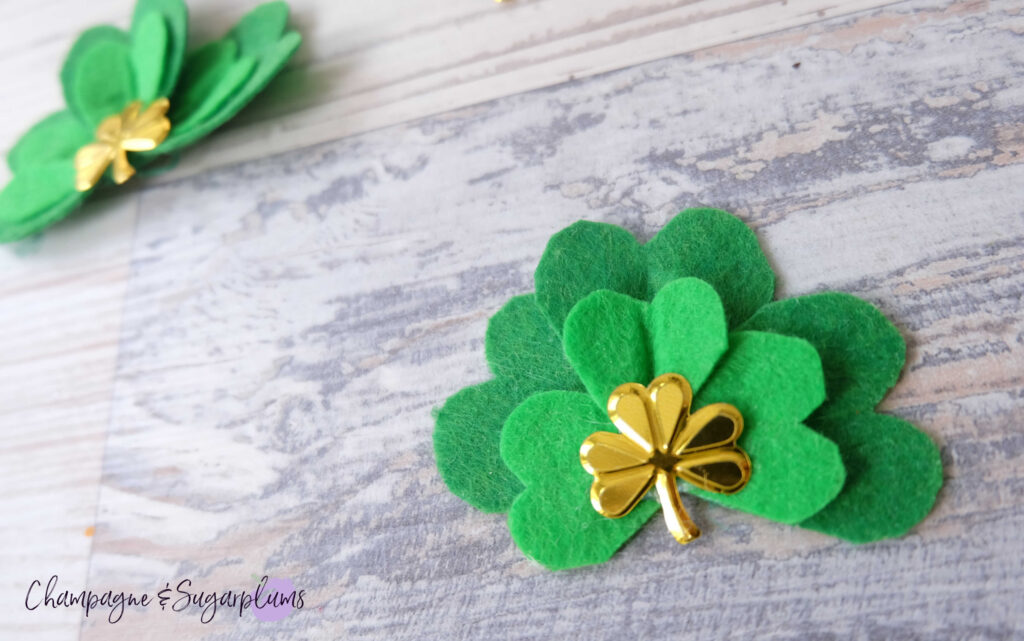
Place the large leaf template on top of some felt and the small leaf template on a different shade of green. You can pin the template to the felt or trace around the template to make cutting easier. Keep in mind that you may see marks on the final shamrock if you choose to trace.

Cut out three large leaves and three small leaves (or four of each if you prefer to make a lucky clover!)

Fold one of the leaf pieces in half lengthwise. Next, pass the threaded embroidery needle through the bottom of the leaf.

Continue to add all the leaves, similarly, until they are all on the needle.
Then, pull the needle through the leaves, and tie the tails tightly into a knot, gathering each leaf tightly as you work.

Next, hot glue a shamrock sequin to the middle of the shamrock for some shine!


![]()

We hope you loved this How to Make a Simple Felt Shamrock tutorial! If you’re looking for more St. Patrick’s Day fun, certainly check these recipes and crafts out!
St. Patrick’s Day Recipes!
- Chocolate Cupcakes with Peppermint Frosting
- St. Patricks Day Rainbow Truffles
- The Galway – A Cucumber Mint Cocktail
- Lucky Green Smash
- Quick and Easy Pot of Gold Pretzels for St. Patrick’s Day by Crayons and Cravings
- St. Patrick’s Day Pudding Shots by The Short Order Cook
- Copycat Shamrock Shake by Cincy Shopper

More St. Patrick’s Day Crafts!
- How to Make Yarn Wrapped Green Balls
- Shamrock Rainbow Kids Finger Paint Craft
- St. Patrick’s Day Clover Chair Sashes
- Let’s Grow a Rainbow by Lil Tigers
- Pepper Stamping: Easy Preschool Shamrock Craft by Simply Full of Delight
- Egg Carton Rainbow Craft for Kids by Lovely Indeed


You May Also Like

Lucky Green Smash
Rustic Rainbow St. Patrick’s Day Lucky Signboard