Christmas Card and Photo Boxes in Three Styles
It’s official…it’s time to dive into Christmas! Are you ready for it? We are! And the first step every year is to send out cards to friends and loved ones. You may even be receiving some already which it perfect, because we’re excited to be sharing these Christmas Card Holders, with three ways to decorate them, for any and all seasonal style. It’s the perfect, easy DIY to break into the holiday season.
What You’ll Need:
- A shallow wood box
- Acrylic paint
- Glitter (optional)
- Hot glue gun and sticks
- Mini decorations
- Small clothes pegs

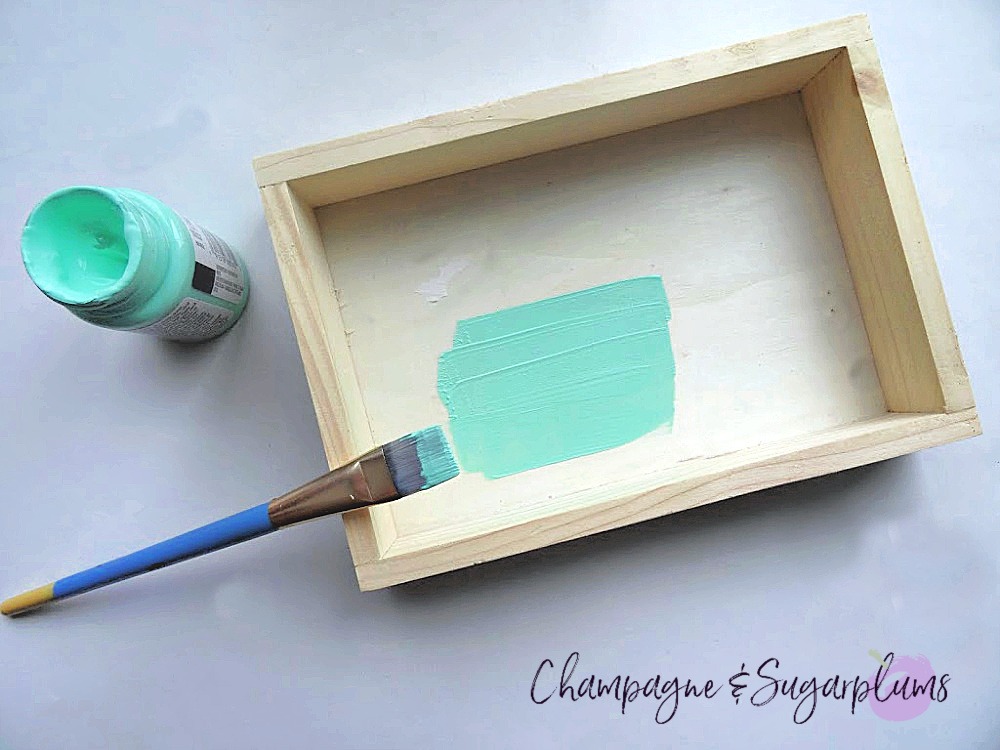
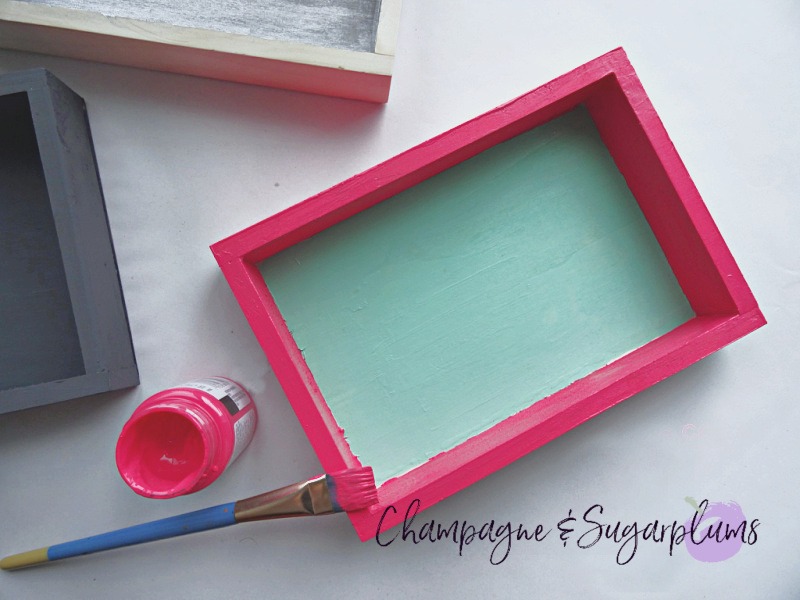

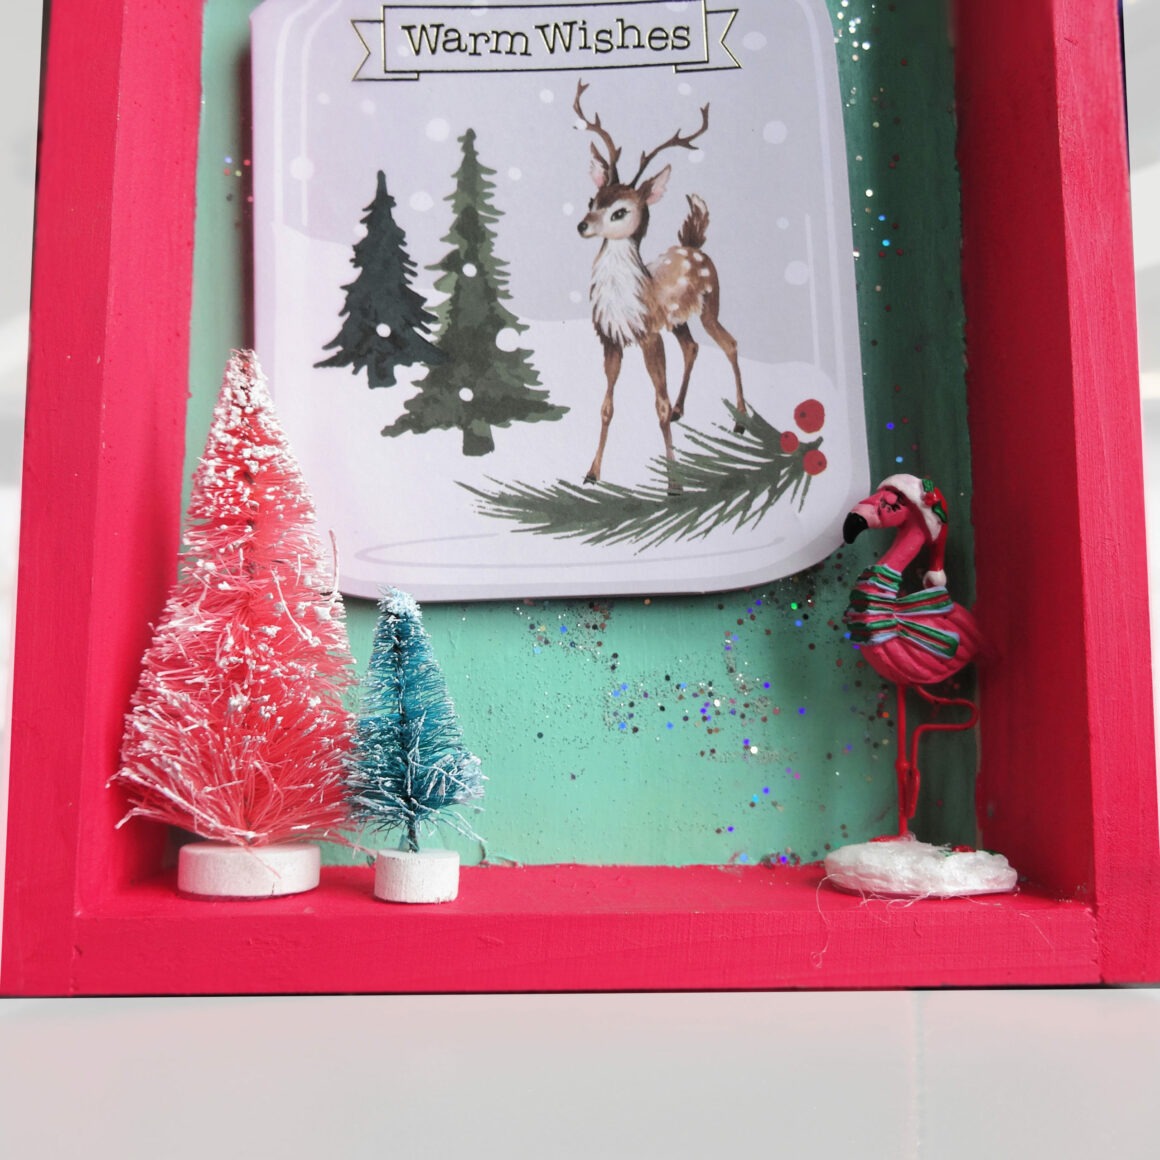
Paint the inside of the box mint and then the outside a bright, deep pink. Add a layer of glue to the inside part of the box, covering the mint then sprinkle with glitter. Glue the mini decorations and clothes pin in place. Be sure to let everything dry between steps.


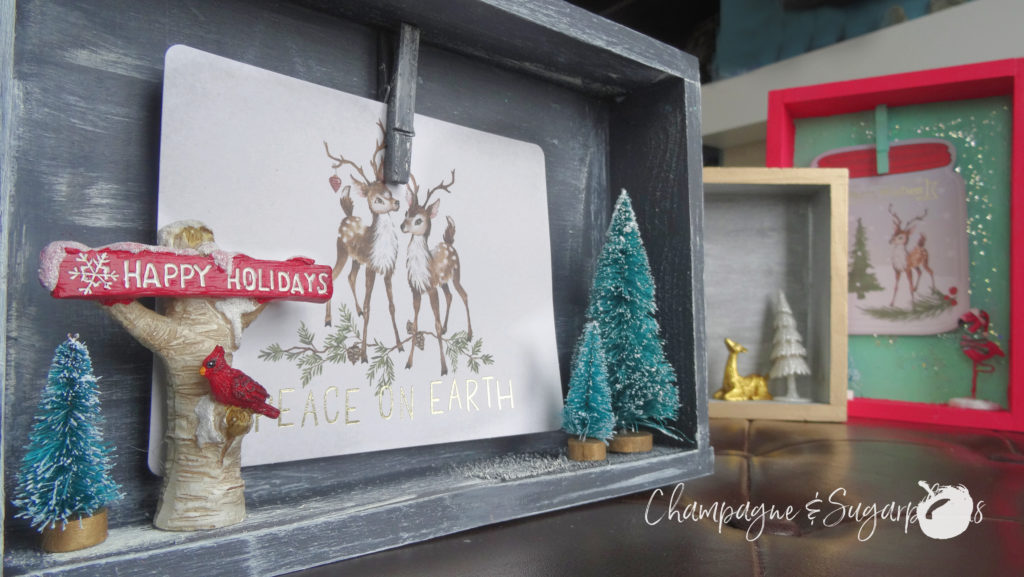
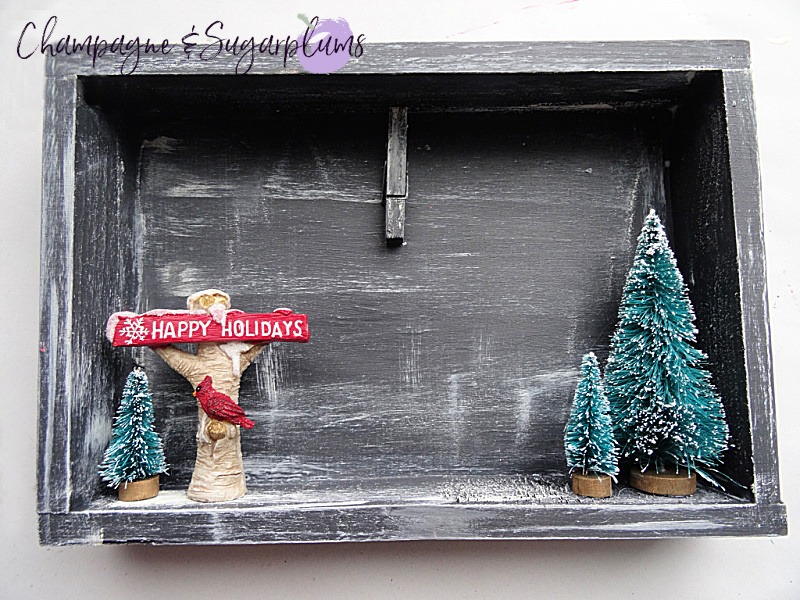
Paint the entire box dark grey. When the grey is dry, use a sponge brush to add a light layer of white to create a weathered wood look. To make this effect, dip the sponge into paint and wipe off any excess before dragging the sponge lightly across the wood. Add some mini decorations to the bottom of the box.


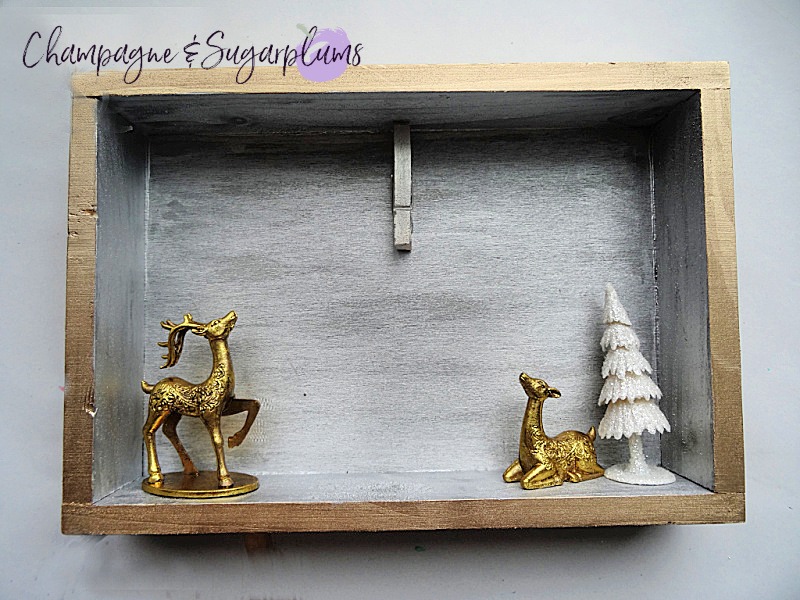
Paint the inside of the box silver and the outside gold, and then finish with the mini decorations and clothespins.


Now you can display your Christmas card and photos in style, happy crafting!

If you enjoyed this step-by-step you should check out our Retro Inspired Photo Transfers or how about a Personalized Outdoor Wooden Christmas Signpost
Disclosure: Some of the links in this post are affiliate links. There may be a small commission made by our recommendations, and/or link to products or services mentioned on this website. Your purchase will help us continue to bring you amazing content, step-by-steps and product reviews.